How to create Bootable Flash Drive for Windows 8.1/8/7/XP and other type of OS

In olden days we all are used to burn CD/DVD to
write #Bootable Operating System. Now, nobody wants to use CD/DVD. All are dependent
with USB Flash drive. The USB Flash drive will help to use #bootableUSB instead
of bootable CD/DVD. Only we need the #ISO image of the operating system to
create the bootable flash drive. There is a tool Rufus, it is a utility that helps format and create bootable USB
flash drives, such as USB keys/pendrives, memory sticks, etc.
It
can be especially useful for cases where:
- You need to create USB installation media from bootable ISOs (Windows, Linux, UEFI, etc.)
- You need to work on a system that doesn't have an OS installed
- You need to flash a BIOS or other firmware from DOS
- You want to run a low-level utility
Requirements:
> Rufus Tool
> ISO image
> Flash Drive (Min 4GB)
> Rufus Tool
> ISO image
> Flash Drive (Min 4GB)
Steps following:
Step 1: User left double click on "rufus-1.4.9.exe (list item)"
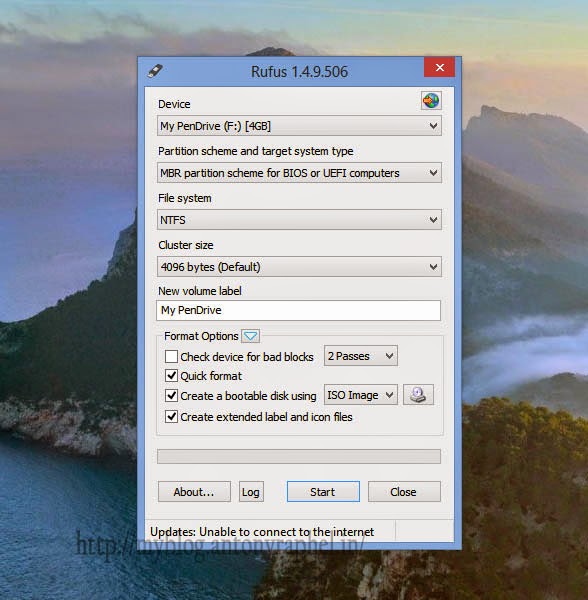
Step 2: Select "My
PenDrive (F:) [4GB] (list item)" on "Device (combo box)" in
"Rufus 1.4.9.506"
Step 3: Select "MBR partition scheme for BIOS or UEFI computers (list item)" on "Partition scheme and target system type (combo box)" in "Rufus 1.4.9.506"
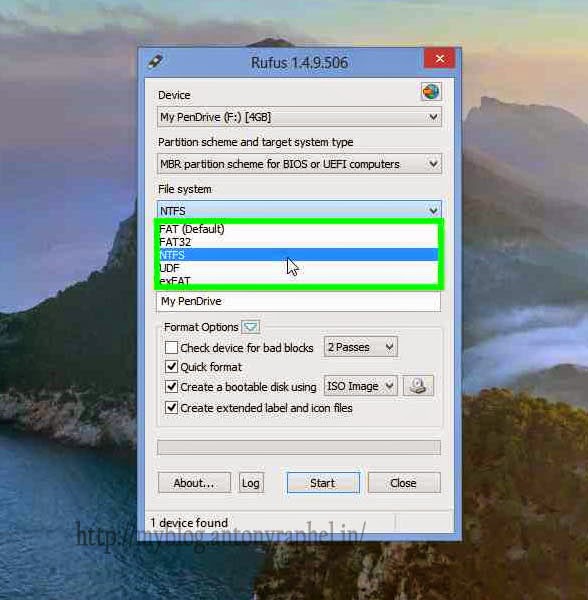
Step 4: Select "NTFS (list item)" on "File system (combo box)" in "Rufus 1.4.9.506"
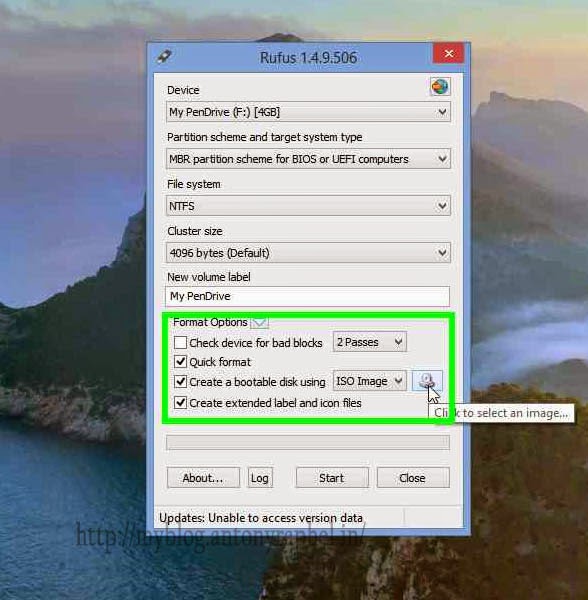
Step 5: User left click
on "ISO Image (list item)"

Step 6: User left click
on "... (Button)" in "Rufus 1.4.9.506"
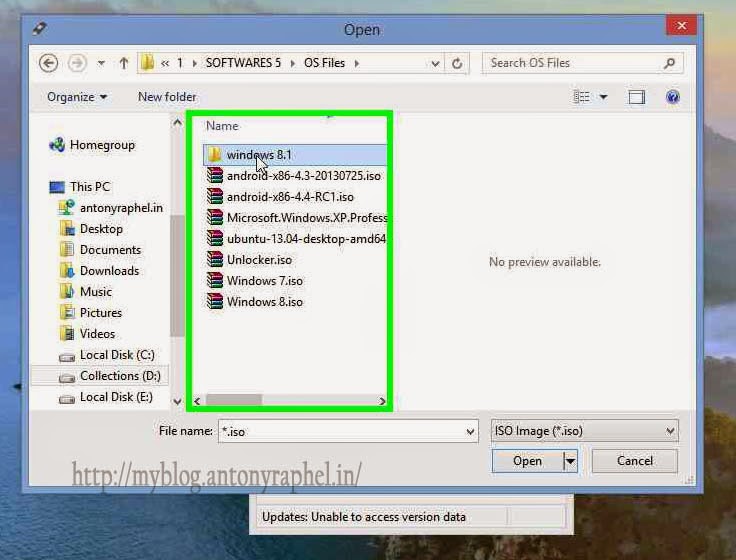
Step 7: Select correct
os that want to make bootable in "Open"
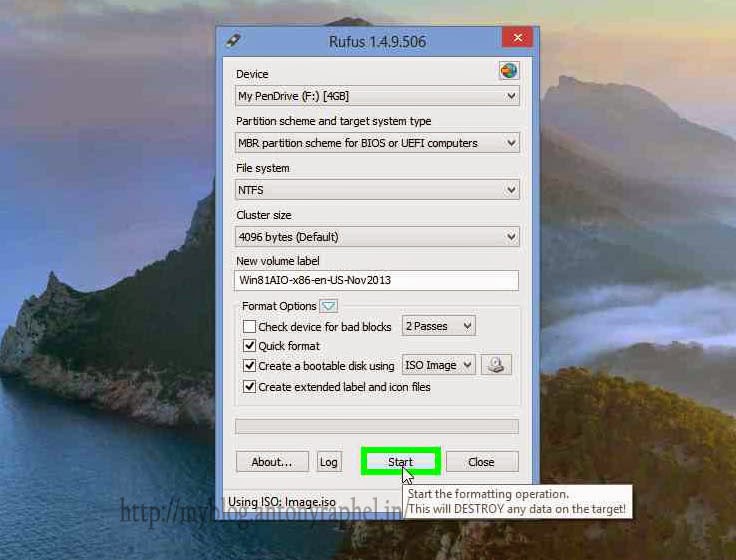
Step 8: Click on
"Start (button)" in "Rufus 1.4.9.506"
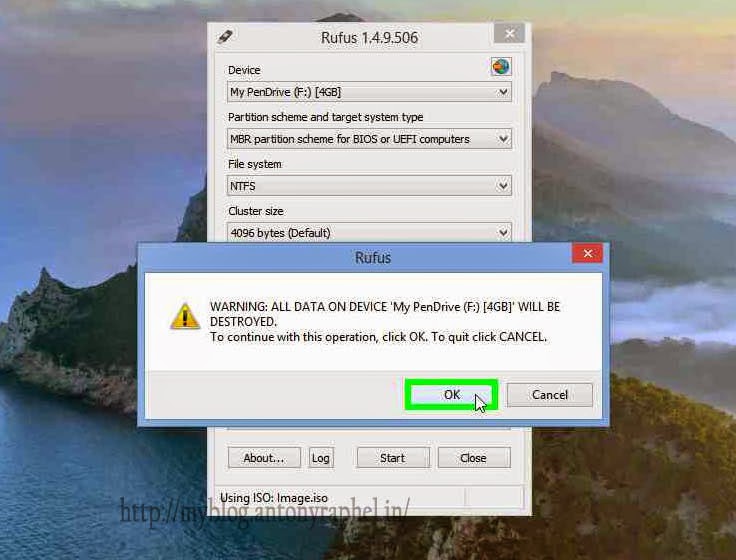
Step 9: Click on
"OK (button)" prompt message box in "Rufus"
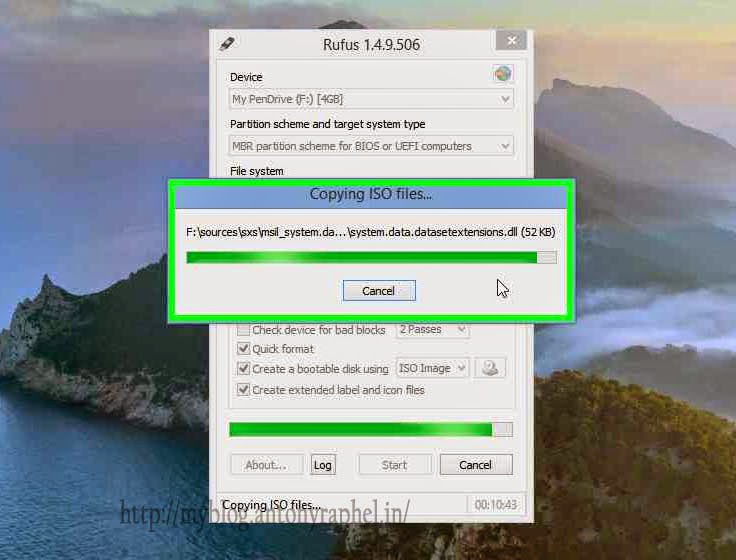
Step 10: Wait for
finish the "Copying ISO files... (Dialog box)" it will take 10-15
mins to finish copying.
Step 11: Done!
Step 12: Click on
"Close (button)" in "Rufus 1.4.9.506"
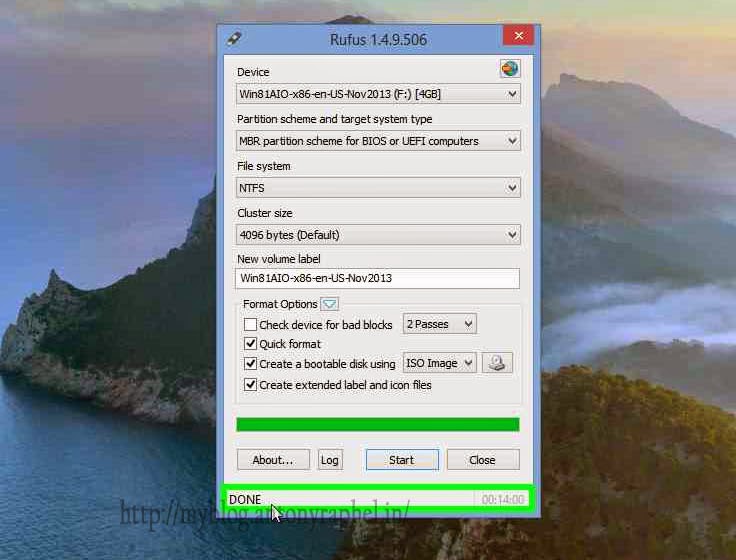
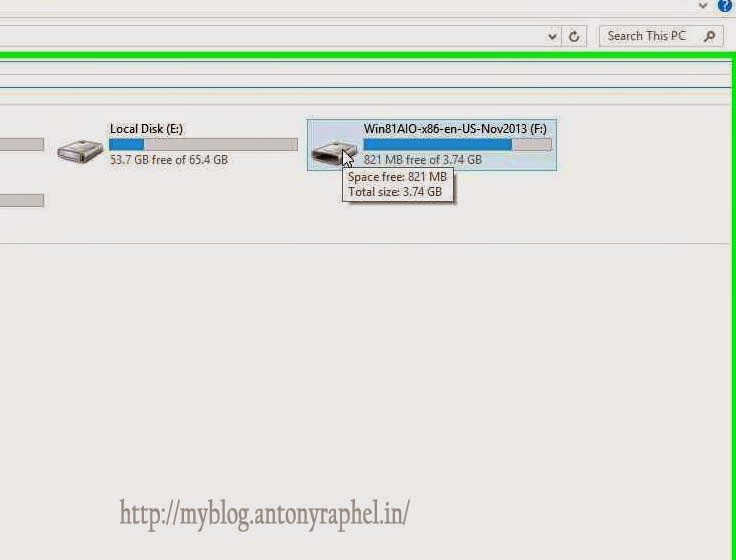
Step 13: Check the
flash drive name as "Win81AIO-x86-en-US-Nov2013 (F:) (list item)" in
"This PC" Now you can ready to use.
Download the tool from here..

Watch this video to know more...
Subscribe to:
Post Comments
(
Atom
)


.JPG)
No comments :
Post a Comment